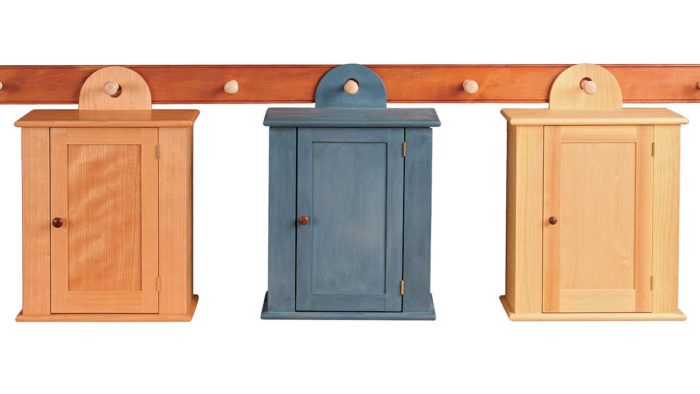
Synopsis: This small Shaker cabinet was inspired by a piece from the Hancock, Mass., Shaker community. Christian Becksvoort made some design changes, such as substituting a frame-and-panel door for the original slab door. The cabinet’s light but strong dovetailed case is dressed up with non-structural top and bottom panels with overhanging, bullnosed edges. The semi-circular hanger was adapted from a larger cabinet. This cabinet looks great in any number of woods, or with a painted finish.
The Shakers didn’t invent the peg board, but they refined it, popularized it, and made it one of their hallmarks. They used peg boards to hang not only hats and clothes but also brooms, mirrors, clocks, chairs, shelves—even cabinets. And their wall-hung cabinets have always interested me. This version was inspired by one of my favorites, a small cabinet from the Hancock, Mass., community. The original had a slab door, but I’ve substituted a frame-and-panel door. I adapted the semi-circular hanger from a larger cabinet, and incorporated half-blind dovetails in the case.
The slight proportions are part of the charm of the piece. The case and the door frame are 1⁄2 in. thick, while the back is 3⁄8 in. and the shelves and door panel are just 1⁄4 in. thick. I’ve built quite a few of these cabinets, and they look great either painted or clear finished in pine, cherry, or walnut.
A small, strong case
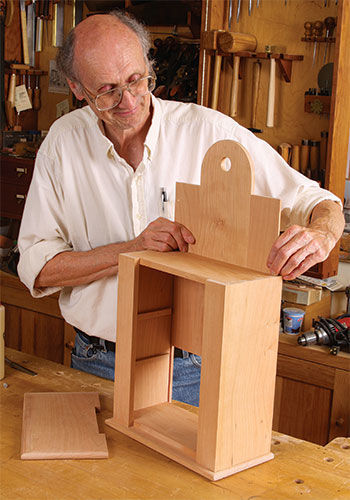
The original cabinet’s case is nailed at the corners, but I made min with half-blind dovetails for additional strength. Lay out and cut the dovetails using your preferred method, keeping in mind that while the case parts will all be flush at the front, the sides are wider than the case top and bottom because they are grooved for the back.
Before assembly, sand the inside surfaces of all four pieces. Then glue and clamp, checking to be sure the case is perfectly square. When the glue is dry, plane or sand the exterior surfaces flat and smooth.
While the case is curing, make the cabinet top and bottom. With a roundover bit at the router table, shape the bullnose on their front and side edges, where they’ll overhang the case. Glue the bottom to the case at this point, and then add the faceframe stiles and the shelf supports.
For the full article, download the PDF below:







Comments
I REALLY enjoyed building this cabinet for a number of reasons. Some I knew in advance, such as:
1. CVB wrote that he had built a number of them and liked the design, so that alone was reason enough to do it. The guy knows his stuff and I wish he had a spare bedroom for rent.
2. I'm attracted to smaller things that are easier to machine and handle during the assembly and finish process.
3. Use of paint-grade material (pine) for the first one would provide a feel for the build without worrying about material cost if I messed it up (not that it's ever happened before, but . . . ;)
4. The free look. From the get-go I could see that the project would provide great practice on half-blinds with the knowledge the decorative top and bottom would cover them up if they weren't perfect. They weren't and they did. The overall build was straightforward and with more to come.
Nearing the "oh my gosh this thing is almost finished and I got no idea what to do with it" I was visiting one of the kids whose sitting room features a large fireplace/hearth, and noticed that the big blue pots on her mantel were about the same color as the Federal Blue paint in one of the article pix, and that a matching accent piece on the hearth might fit and also provide a spot to hide the remote. She agreed and I learned some good lessons about milk paint along the way.
My stock answer to the "so how's your woodworking coming along?" is "well, some of it is almost good enough to give away" and for my lovely daughter followed by "Happy Birthday to You."
So it seems to me that the dovetail joints should be the other way around, with the dovetails being on the vertical sides. Wouldn't the current configuration be prone to the dovetail sliding out of place (ignoring any support given by the back pieces)?
Technically, you're right. But, they'd be visible. As with many things, there is a trade off.
I really like this box in terms of functionality and simplicity (love those Shakers!) Just wondering about one thing when viewing them in the photos. What's to keep the cabinets from sliding down the peg to rest in the lowest part of the cove, especially when weighted down with stuff on the shelves?
Log in or create an account to post a comment.
Sign up Log in