Resharpen, Restore a Dovetail Saw
Chris Gochnour outlines five easy sharpening steps to a smooth, straight-cutting saw.
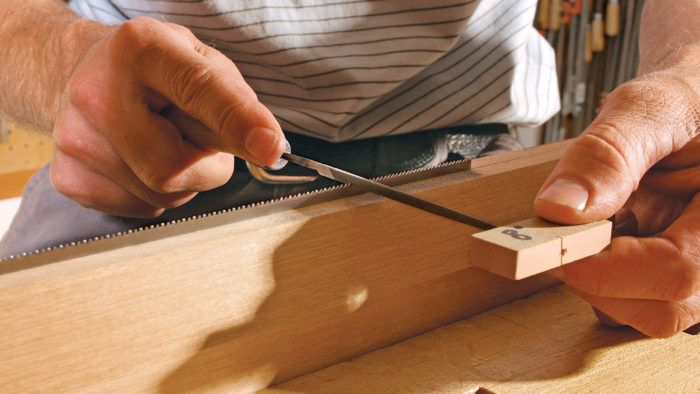
Over the years, I have sent out dovetail saws for sharpening to many different services, and the results have ranged from fair to downright unacceptable. Consequently, I decided to bite the bullet and acquire the skills of saw sharpening myself. As it turns out, this task is not difficult, and the tools required are minimal.
Although all saws dull, not all can be resharpened. Japanese-style saws, which cut on the pull stroke, have thin, razor-sharp blades that are difficult to resharpen. When they dull, they often are sent out for sharpening or simply discarded. Western-style saws, which cut on the push stroke, have thicker blades that can be sharpened easily. And with my approach, any Western-style dovetail saw can be tuned up to perform as well as an expensive, finely tuned saw.
Most dovetail cuts are made with the grain, so I sharpen my dovetail saws with a rip-tooth pattern. Generally, sharpening takes five simple steps: jointing, shaping, setting, sharpening, and honing.
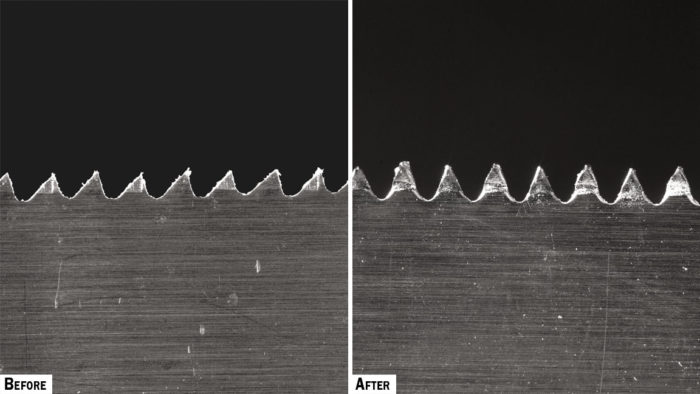
Only saws with irregularly sized teeth-some big, others small-or with an undesirable rake angle (the angle of the front of the sawtooth) require all of these steps. If a saw’s teeth are in relatively good shape, you can proceed directly to the sharpening step (see Step 4).
Most of these steps require you to hold the saw in a vise. If you don’t own a saw vise, make one out of scrapwood (see top photo). Size it to fit into your bench vise, and be sure it is long enough to hold the entire blade of the saw.
Jointing levels the playing field
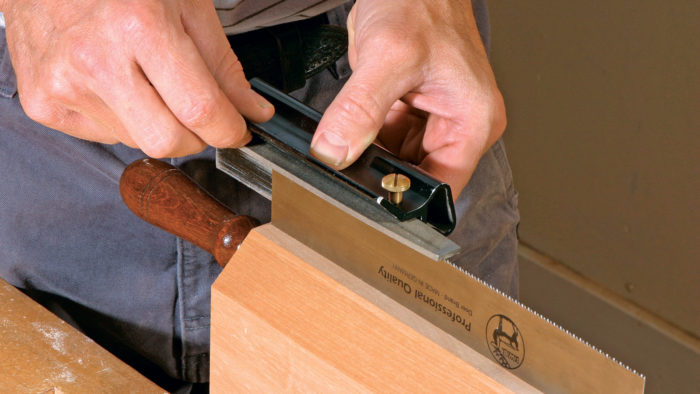
Jointing flattens the sawteeth and brings them to a consistent height. Working from the heel of the saw (the handle end) to the toe (the tip), take a pass with an 8-in. mill bastard file, keeping it in line with the blade but exactly perpendicular to its sides, so that the teeth are flattened squarely, not milled at an angle. If one side of the teeth is higher than the other, the saw will drift or curve in the cut. A file holder (available from www.leevalley.com) will come in handy here.
After one pass, you probably will notice that some of the teeth have flat spots, while others have not been touched. Take more passes until all of the teeth have been touched at least lightly by the file, but no further. If your saw has a few broken teeth, don’t worry about them; eventually, through repeated filings, they will “grow back.”
1. Joint:
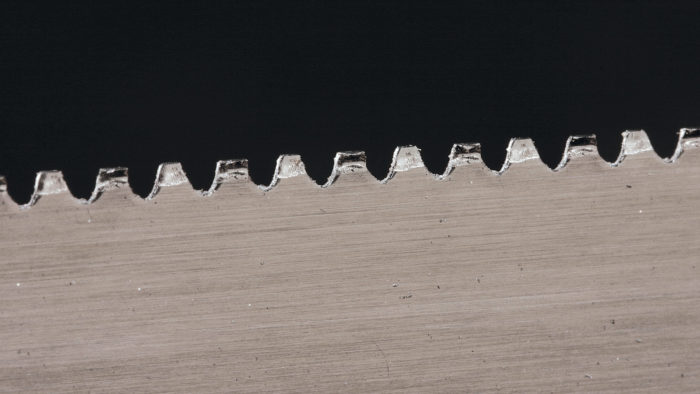
Shaping restores teeth to proper form
The objective of shaping is to bring all of the teeth to a point-the same height and the same shape, with gullets of uniform depth. Some people prefer to shape sawteeth with a 0° rake, which means the fronts are vertical, or at right angles to the blade. This can make for a fast-cutting saw, but one that is difficult to start and makes a rougher cut. A rake angle of 15° makes for a saw that is easier to start and cuts smoothly, albeit slowly. I favor an 8° rake angle, which gives a nice compromise between speed, ease of start, and smoothness of cut.
There’s a lot to be done during shaping, but the right tools can make the task easier. Start with proper lighting to improve your chances of success. I like to use low light that rakes across the tops of the sawteeth clearly. I sometimes use a lamp with a magnifying lens to help me see what I am doing.
You also will need a triangular saw file of the proper size, which is determined by the number of teeth per inch (tpi) of the saw being filed. Use a 5-in.-long extraslim taper on saws with 11 tpi to 14 tpi, and a 4-in.-long extraslim taper for 15-tpi to 18-tpi saws. A handle for the tang of the file makes the tool easier to control and protects your hands in case of slips. I also insert the file into a wooden guide block that helps me to maintain a consistent rake angle.
2. Shape:
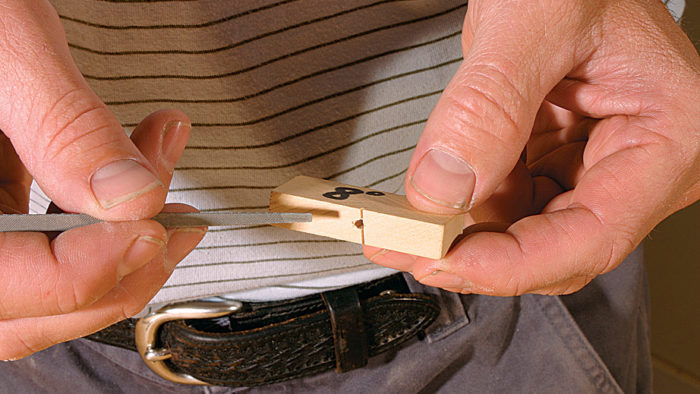
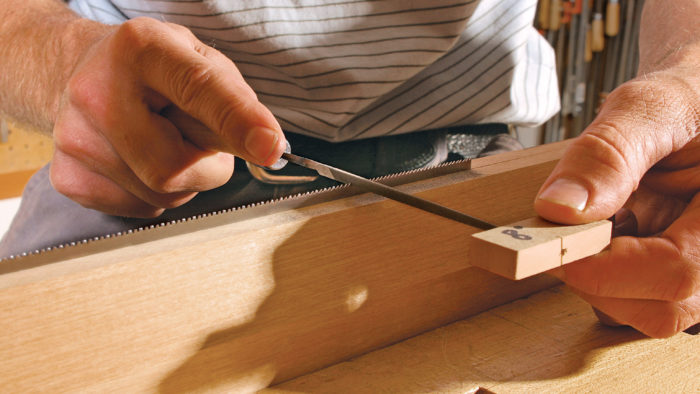
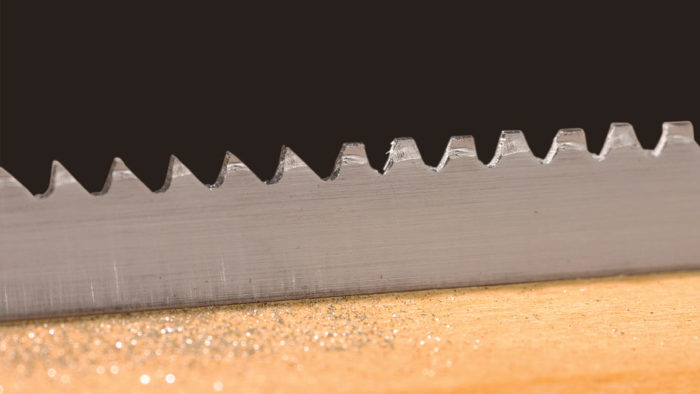
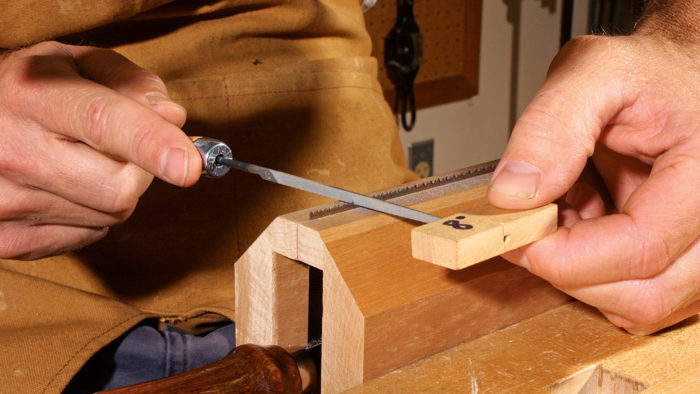
To begin shaping, clamp the saw with its teeth just barely above the jaws of the vise to dampen any vibration during filing. Start filing in the first gullet at the toe of the saw and work from gullet to gullet toward the heel. Take one or two strokes, filing the front of one tooth and the back of another at the same time.
The objective is to reduce the flats on each side of the file by 50% and maintain a consistent rake angle. Keep the file perpendicular to the blade and parallel to the benchtop to ensure that all teeth are filed uniformly. Make sure the rake-angle guide block is parallel with the sawteeth. Don’t drag the file back in the gullet, because this will dull it prematurely. If you observe, for example, that one flat is larger than the other, exert a little extra pressure toward the larger flat to reduce the size of the larger tooth while allowing the smaller tooth to grow. Keep filing until all flat spots have been eliminated.
Proper set creates clearance
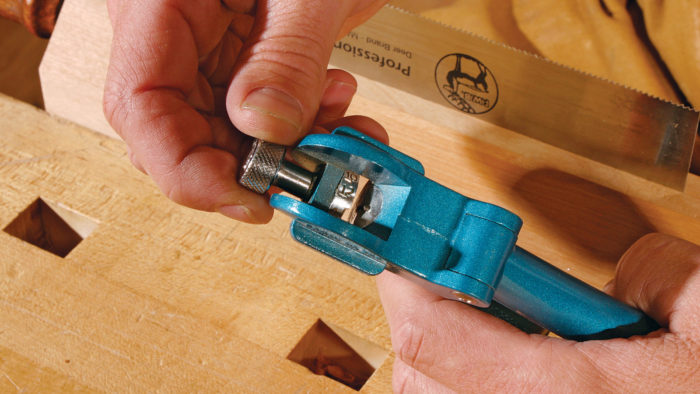
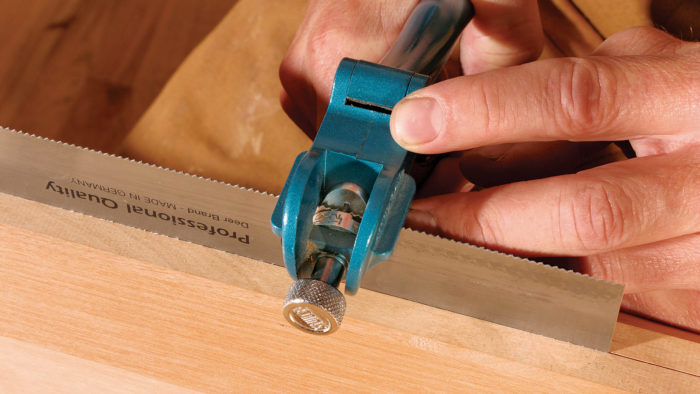
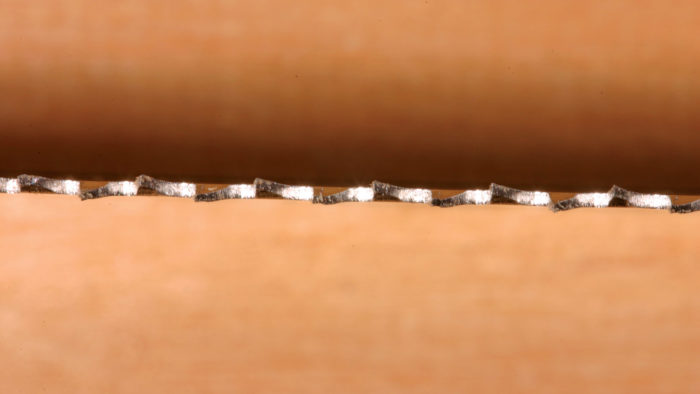
Once the teeth have consistent size and shape, the next step is to set the teeth, or adjust the amount that the teeth protrude from the sides of the blade. Setting the teeth allows them to cut a kerf that is wider than the blade’s body.
I aim for a total set ranging from 0.004 in. to 0.008 in. To determine the set of a saw, measure the thickness of the blade with dial calipers. Then use the calipers to measure opposing teeth, tip to tip. The difference equals the total amount of set.
Place the saw in the vise with its blade fully extended. Then, using a saw set adjusted to its lightest setting, reset all of the teeth that are bent away from you. Note that only the upper half of each tooth is bent. Once you have set the teeth on the first side, turn the saw around and reset the teeth that are bent away from you. Excessive or inconsistent set will be corrected during the honing phase.
Sharpening adds bite
Sharpening is similar to shaping, but where shaping removes more material and all filing is done from one side of the saw, sharpening removes only enough material to restore sharpness. Also, during sharpening the filing is balanced by working every other gullet from opposing sides of the saw.
Start by giving the saw a light jointing. This ensures that all the teeth are level, and just as important, it creates tiny flats on the tops of the teeth that will help you determine how much material to remove.
Now, clamp the saw with its handle to the right and its teeth just barely above the jaws of the vise to dampen vibration. Start filing at the toe of the saw and work toward the heel. Again, use the rake-angle guide block.
Place the file in the first gullet that has the front of the tooth bent away from you. Take one or two strokes, keeping the file perpendicular to the blade, and watch the flat spots on both sides of the file diminish. Move the file to the right, skipping one gullet, and file again. This gullet should also have the front of the tooth bent away. Then, skip a gullet and repeat all the way to the heel of the saw.
On the first pass, the objective is to reduce the flats by 50%. When one side of the saw has been filed from toe to heel, rotate the saw 180° so that the handle is to the left. Because the teeth are now pointing in the opposite direction, you must turn the guide block end for end so that you are holding the file correctly. Now file the gullets you skipped on the first pass, this time moving from heel to toe. Stop filing when all the flat spots are gone.
4. Sharpen

Honing evens out the set
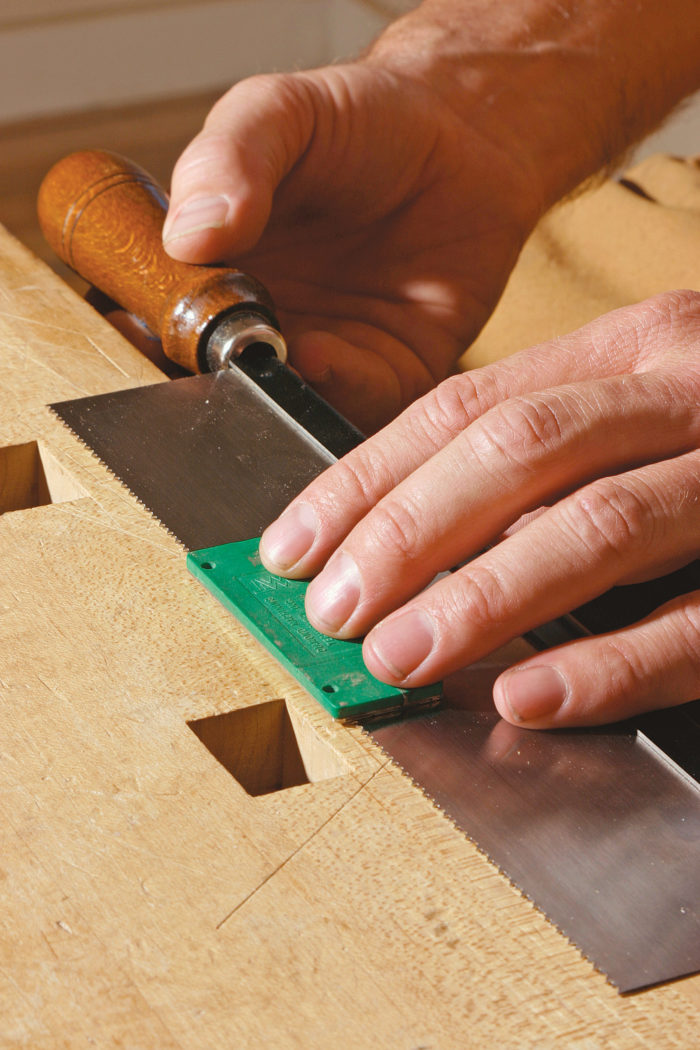
At this point, all of the teeth should be sharp and the same height. Honing removes filing burrs and equalizes the set on both sides of the blade. Place the blade flat on a bench, and run a small oilstone or diamond stone down the side of the teeth from heel to toe. Repeat on the other side of the saw.
After honing, make some test cuts. If the saw pulls to one side, hone the saw again on the side toward which it is pulling. Be careful not to overdo it and remove too much set.
Once you have a razor-sharp, well-tuned saw, the joy of hand-cutting dovetails can begin again.
5. Hone
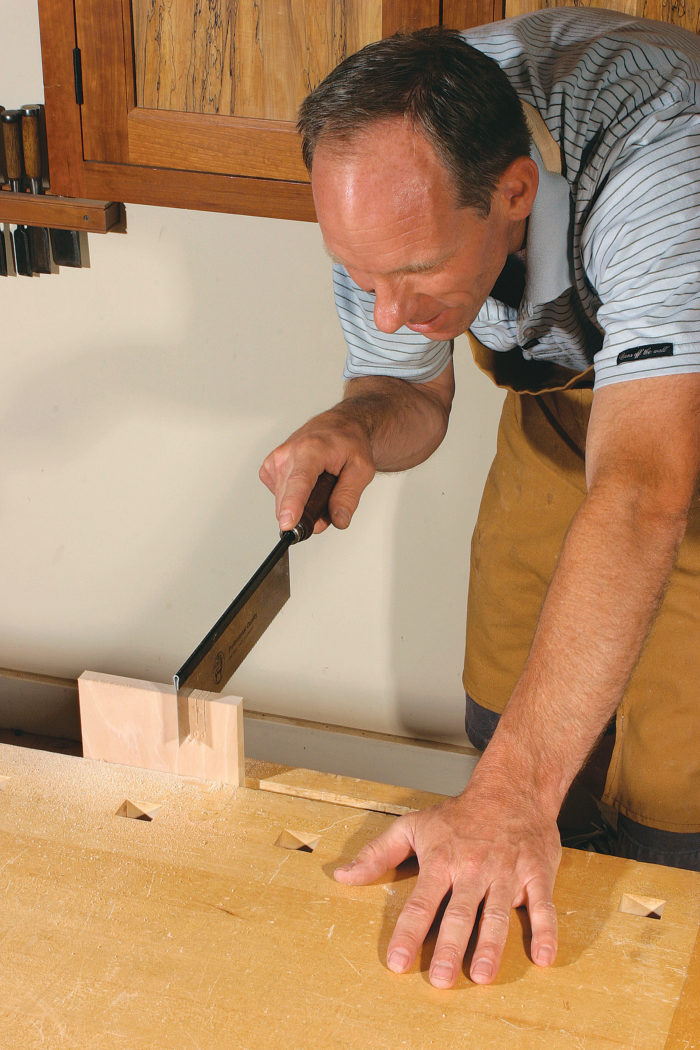
Watch a video of the author sharpening a Western-style dovetail saw.



Log in or create an account to post a comment.
Sign up Log in