Overcoming beetle damage – then highlighting it
Those pesky boring insects can create a unique surface for the right project.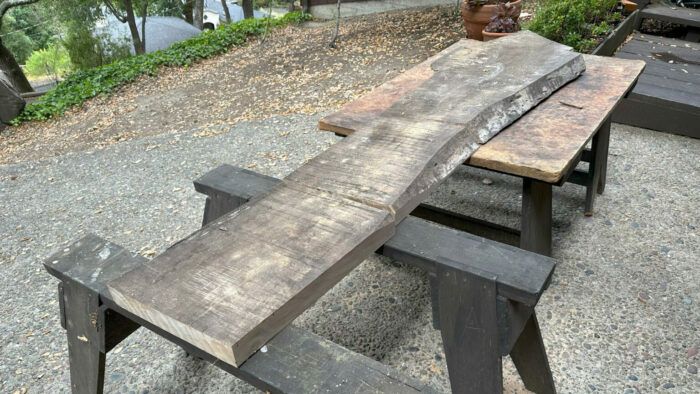
Introduction
I needed a new project and kept seeing an old saw-milled plank of Modesto ash (see photo below) in my stash of lumber. What furniture project would fit with this final piece of insect- and weather-damaged ash plank? I say “final piece,” as this was left over from a period of building Windsor chairs 10 to 15 years ago. Ash was a perfect material for Windsors, with its strength, bendability, and beautiful grain figure.
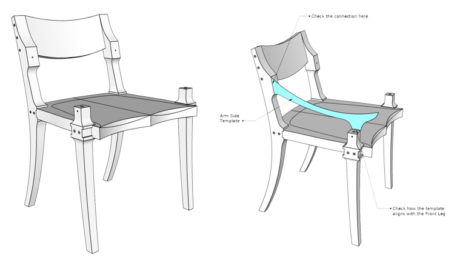
I only had this one plank—also there were no more local sawmill sources. So the project would have to be limited in size—small enough to fit. I wondered if it would be possible to reproduce another Maloof lowback chair. Also, I thought this might be a good project for next semester’s class on Building Classic Furniture. I had built one of these chairs in 2010 using local saw-milled silver maple. But now my motivation was to use this large saw-milled plank of 8/4 Modesto ash.
Making templates
I was anxious to test whether that plank would be big enough, so I quickly prepared the full-size templates for all chair components. Dodging knots and splits, I carefully arranged the templates and used chalk to mark the possible locations of all components. (Note: The photo below doesn’t show the cutoff that would accommodate the seat.)
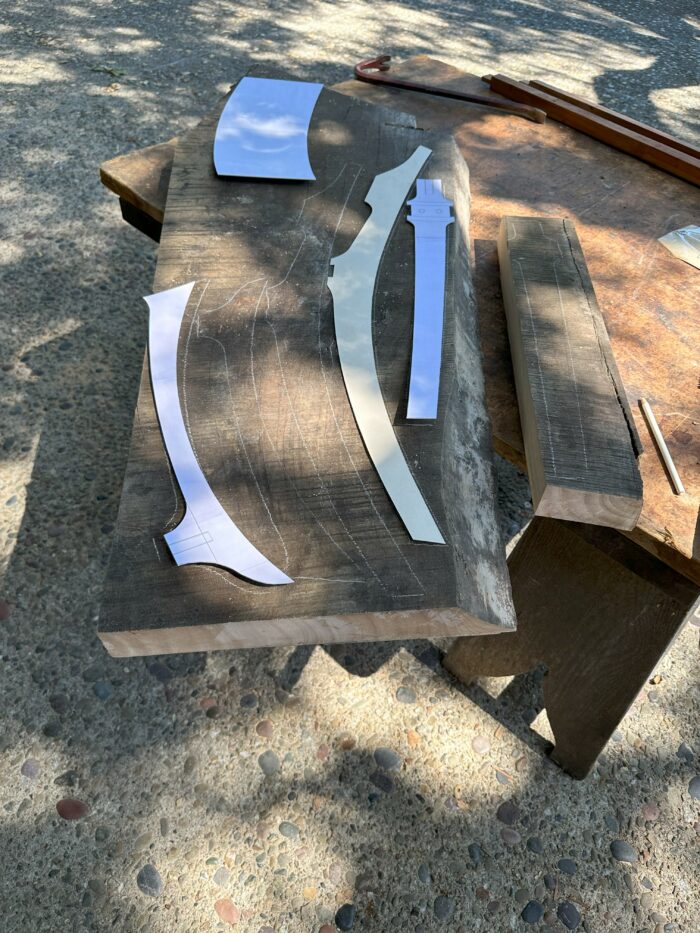
Although I was able to manage positions for all components, there would be no spare parts—thus a concern about ruining a piece in the process. Also, I realized that the 8/4 thickness would not meet the required width for the arms. A splice of a 5/8-in.-thick piece would be needed to accommodate the full arm shape.
One other issue was worrisome: Would I be able to manage around all the insect damage in the plank? After all, the powder-post beetles had years of unhindered tunneling in this plank.
Powder-post beetles
These wood-boring beetles invade and damage wood furniture as well as structural and decorative wood inside of buildings. The beetle larvae feed on and do most of the damage to wood, and when they reach the adult stage, they emerge through round exit holes, which they create by chewing through the wood surface. 1 The exit holes on my lowback are about 1/32-in. dia.
They are known as powder-post beetles because the larvae create a fine, dust-like powdered frass (a mixture of feces and wood fragments) that has the consistency of baking flour or talcum powder. This boring dust is packed into the larval galleries (feeding channels) in the wood but occasionally falls out of exit holes into small piles on floors or other surfaces.1
- Pest Notes, Publication 7418, University of CA, June 2010
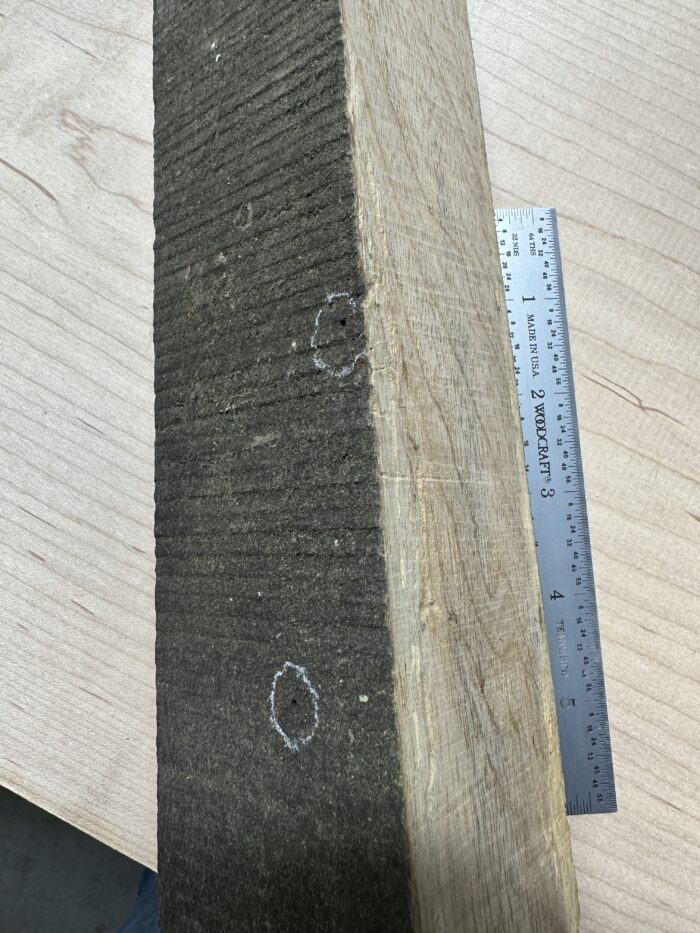
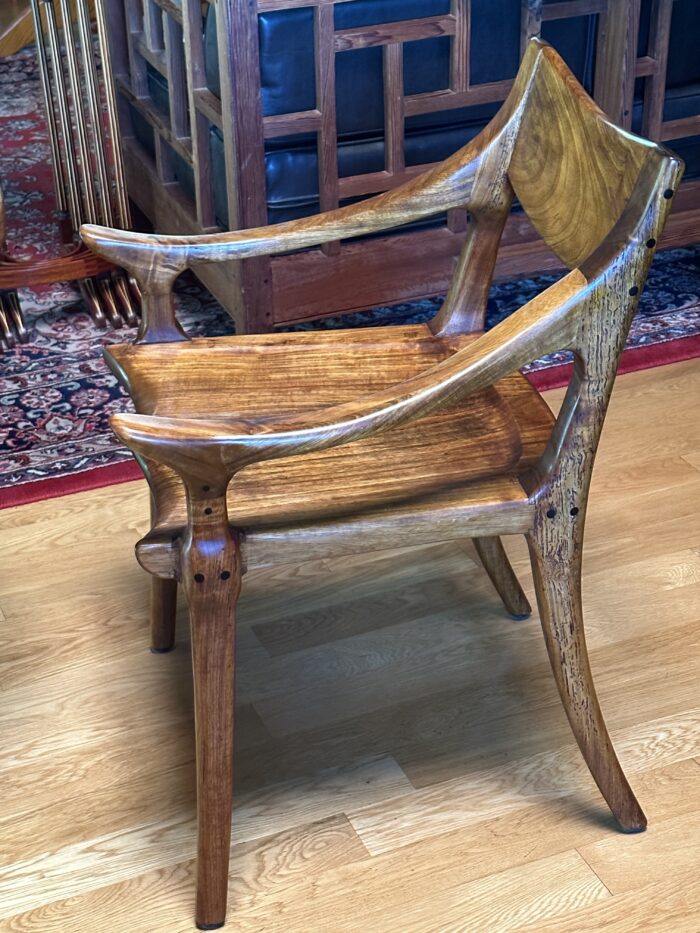
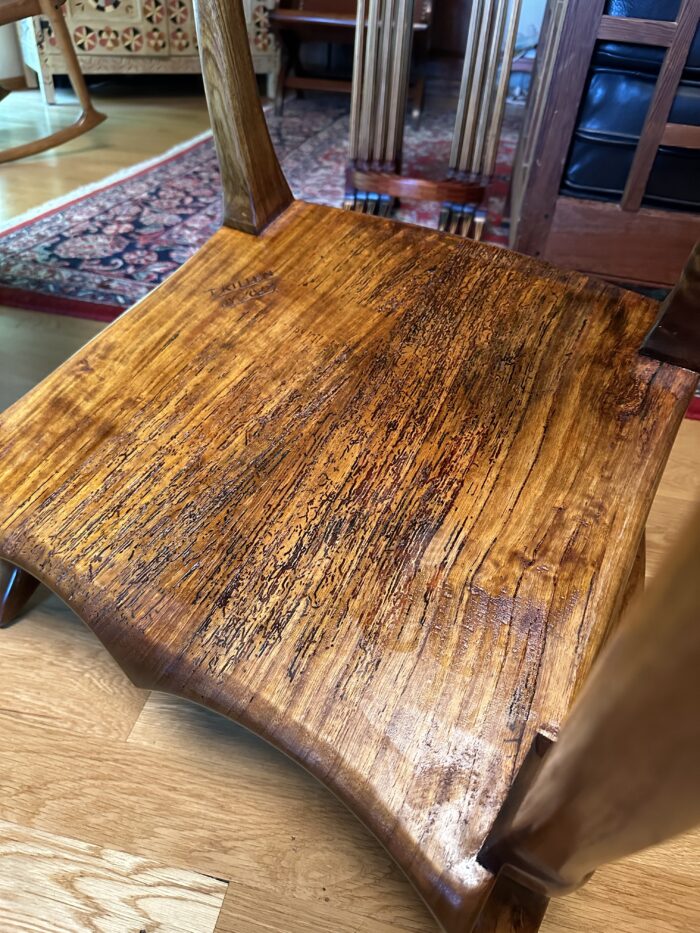
Powder-post beetles attack hardwoods which have pores into which they can lay eggs. Adult beetles most often select and lay eggs in wood such as oak, ash, hickory, and walnut. They also prefer wood with high starch content—I see the infestation only in the sapwood, and you can spot the tunnels right up to the dividing line of sapwood and heartwood. Luckily, my ash plank has little sapwood, so the tunneling is not that deep. I’ve shown a photo of the bottom face of the seat. That whole face of wood is a thin sapwood area decimated by the beetle tunnels. Also, the outside face of the back legs is a thin layer of sapwood with tunnels, shown below.
Control of powder-post beetle infestation
Kiln-drying lumber destroys beetle infestations, although it doesn’t prevent reinfestation. You can heat small wooden items in an oven at 120° to 140°F for 6 hours. You can also place items in a deep freezer at 0°F for 72 hours. This should work for lumber at least 2 in. thick.1 There are effective pesticide formulations containing sodium borate. I’ve not found a need to apply any of these procedures or pesticides.
So, I did not do any heating or freezing parts of the lowback. My experience over the years is that once furniture is finished—shellac, varnish, etc.—the adult beetle will not lay eggs on that piece. However, if the finished lowback contains living larvae, there is the possibility that an adult could dig through the finish to escape and later lay eggs in the escape hole. Over the many years of my furniture making, there were only a couple cases of an escaping adult. These incidents were easily detected by the frass on the floor and the new exit holes. I would immediately coat that new escape hole (easy to detect), with shellac. That ended the chance of that adult laying eggs on that furniture. It has been more than 10 years without any sign of beetles on those furniture pieces.
Preparing for finish
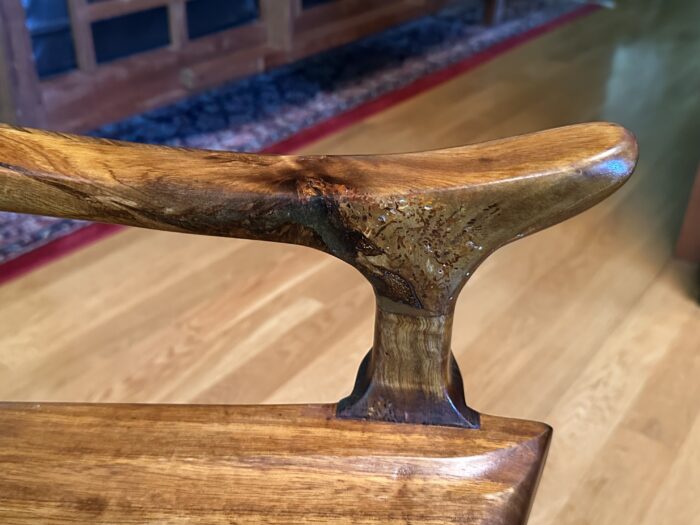
The picture below shows the inside face of the left arm. Not only was there beetle damage, but also a knot with gaps and splits in that vulnerable area. I used 5-min. epoxy to fill these gaps and strengthen that area. There were other areas of cracks, splits, and gaps (not so critical). I also filled these areas with the 5-min. epoxy. I find that the surface of the epoxy blends in well with the final wood finish and coloring. This was all done before any final shaping or sanding.
At this stage I also wanted to treat the beetle tunnel damage on surfaces. Often the tunnels were filled with frass. So I first used a small steel brush to clear those tunnels of any material. After vacuuming the cleared areas, I brushed on hot hide glue. This was not done precisely, I just slobbered on pools of hot hide glue with a brush. I wanted to be sure that the glue entered the tunnels and filled them to some extent. The next day, I used scraper blades to level off these areas. I wasn’t working the hide glue to act as a grain filler that creates a final flat surface, rather to coat these rough areas, and somewhat stiffen them. My recommendation is to use West Systems G/5 epoxy. It dries quickly, but you need to wait overnight before filing, planing, or scraping.
I’ll probably apply paste wax after several days.
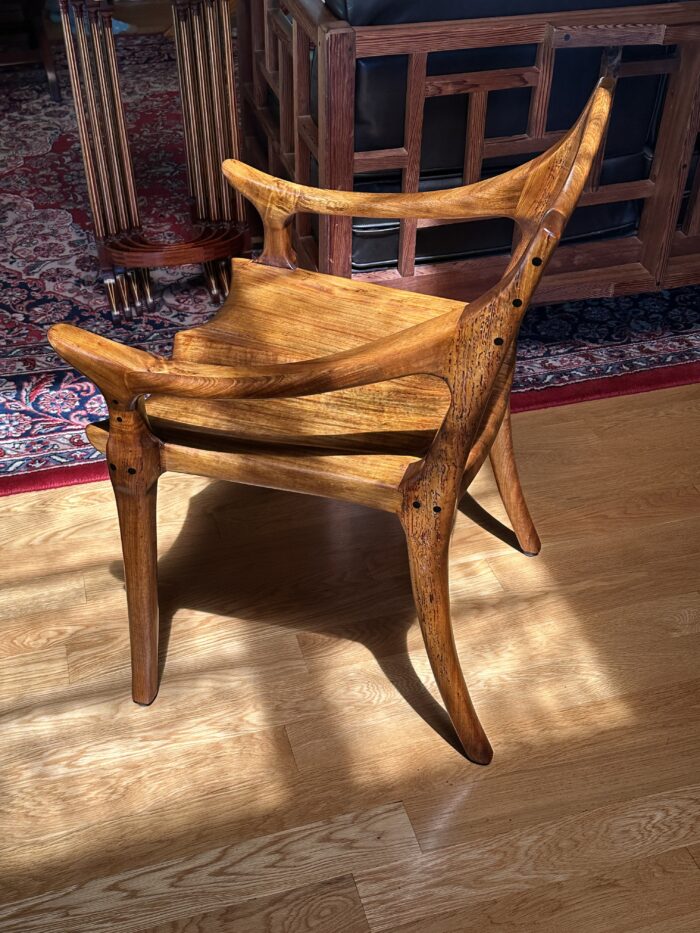
I’m pleased with the results—those insects created a unique look. Also, the chair is extremely comfortable especially for the lower back. So, it is being used every day.
Tim
More from Tim Killen
 |
Dragging out the shaving horseDon’t be scared by the name “garden hurdle.” There’s no jumping required. |
 |
Rotating wings on the butterfly tableIt’s important to get them flat and find a way to accommodate future repairs. |
 |
Challenges with Maloof low-backFrom SketchUp to construction, watch how Tim Killen remakes a Maloof low-back chair using an old plank of Modesto ash. |








Log in or create an account to post a comment.
Sign up Log in