How to Master the Jointer
Veteran instructor shows how to get better results and stay safe.
Synopsis: The jointer is one of the least understood tools in the workshop, and one of the most dangerous, according to teacher Marc Adams. It’s also a critical machine to master, because properly milled wood is not only a joy to work with, but it is essential to quality woodworking. Here, he gives you everything you need to know about how a jointer works and how to get the most out of it, from setup, to basic technique, to tricks for oversize boards.
Buying roughsawn wood is one of the best ways to save money as a woodworker. It is also the gateway to fine work. Instead of relying on the lumberyard to surface and thickness your material, you control every dimension and ensure that every board you use ends up flat, square, and straight. Properly milled wood is a joy to work with, making machining, joining, assembly, and finishing much easier. And you can’t mill wood accurately without a jointer.
Unfortunately, the jointer is one of the least understood tools, and one of the most dangerous, intimidating woodworkers new and old. I’ll explain how it works, how to get much better cuts on it, and how to stay safe at all times.
The milling process: jointer vs. planer
The first step is understanding what a jointer does, and how its job differs from that of a planer. With its tables aligned with the cutterhead, the jointer straightens and flattens one surface with no regard for the opposite face.
In contrast, the planer’s cutterhead is elevated above its reference surface (the bed), guaranteeing uniform thickness but not flatness. If a board goes in bowed or twisted, it will come out that way. This is why the jointer is critical, and comes first in the milling process.
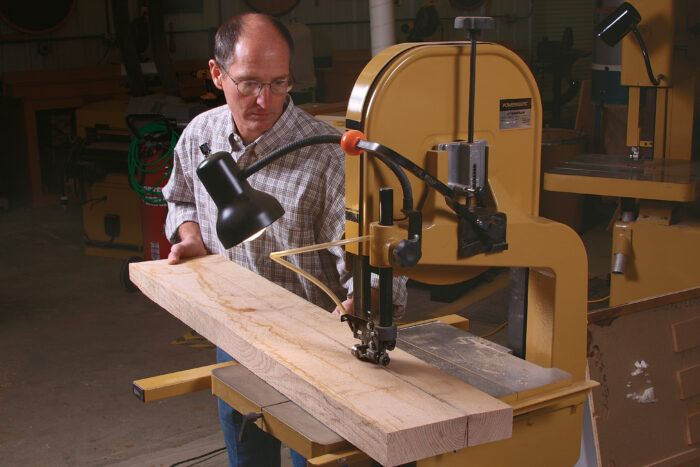
The milling process starts with rough-cutting your workpieces close to their final size. You don’t want to joint an overly long or wide board—you’ll have to take away too much material to get the whole thing flat. In other words, a lot of twist, bow, and cup are removed by simply cutting a board up into shorter and narrower workpieces.
After cutting your pieces to rough length and width, you flatten one face on the jointer, and then run that face against the jointer’s fence to mill one edge square to it. At that point the planer takes over. The straight, flat face goes down against the bed, and you can dial in the thickness, knowing the top face will come out just as straight as the bottom one. The tablesaw usually comes next, with the jointed edge going against the rip fence as you trim the board to final width.
There is another critical difference between the planer and jointer. The planer is automatic. You simply put the wood in one side and it comes out the other. On the jointer, you control the board, and there is a learning curve. That curve starts with understanding how the machine really works.
Set up for success
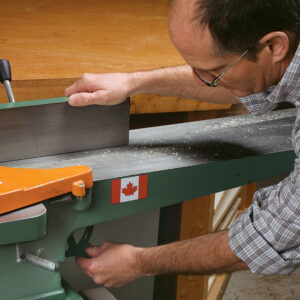
For a jointer to work properly, it needs sharp knives, and an outfeed table that is set exactly level with the top of the knives’ arc. Once it is set, you can leave it alone. The same goes for squaring the fence. Depth of cut is the only thing that changes.
Level the outfeed table
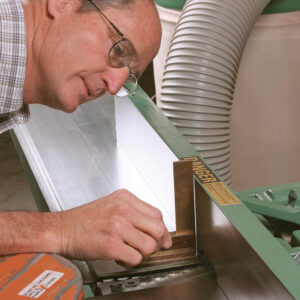
Square the fence and set the depth of cut
Jointer magic
The magic of this machine is in the relationship between the tables and cutterhead. For a start, all three need to be parallel to each other, and the knives need to be sharp and adjusted properly. (For a complete guide to jointer setup, including replacing dull knives, see “Tune Up Any Jointer,” FWW #230).
The two tables do different jobs. The infeed table is adjusted up and down to determine the depth of cut. The outfeed table, which is the reference surface, must be set at exactly the same height as the arc of the knives at their highest point. The jointed surface should pass onto the outfeed table with perfect contact, so you can press down on it and ensure that the rest of the cut stays straight. If the outfeed table is set too high, the stock will bump into it. If it is too low, you will get a tapered cut or an overcut area (“snipe”) at the end of the board.
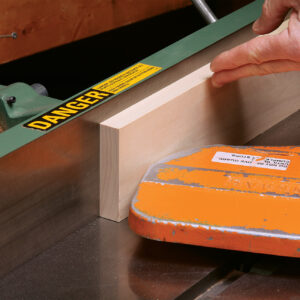
The fence also guides the stock, but it serves different purposes during face-jointing and edge-jointing. When the board is lying facedown, the fence is nothing more than a side guide that provides some additional control. But when a board is on edge, the fence is critical, ensuring that the jointed edge comes out square to the face.
There are two ways to adjust the fence: One is its angle to the table and the other is its distance from the front edge of the tables. I keep the angle locked at 90°. You can tilt the fence to make beveled cuts, but other tools are better at that job, so why throw off the setting? I do use the second adjustment sometimes, moving the fence back and forth to distribute wear evenly across the knives.
Older jointers have a rabbeting ledge on the outfeed table, but that operation requires removing the guard, and there are better tools for rabbeting. Again, leave the jointer set up for what it does best: milling wood straight and square.
Better results when face-jointing
The first step when milling rough lumber is flattening one face. A few important tips will help you work safely, with less tearout and minimal waste.
Break down boards first
Get oriented
Basic technique
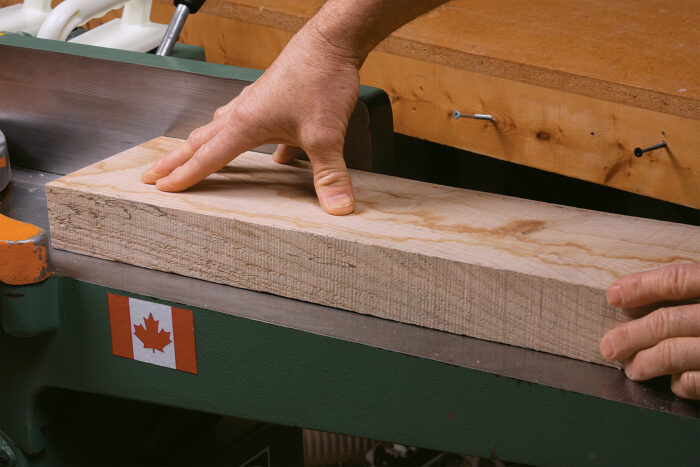
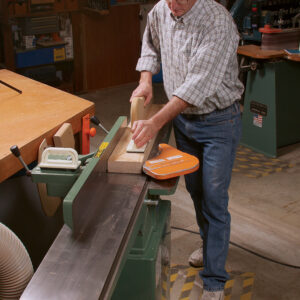
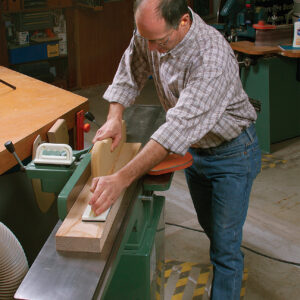
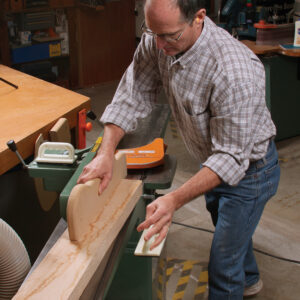
Focus pressure on the outfeed table. The idea is to get pressure to the outfeed table as early as possible, and then keep it there. Keeping the freshly jointed surface pressed down ensures that the rest of the board will come out just as straight.
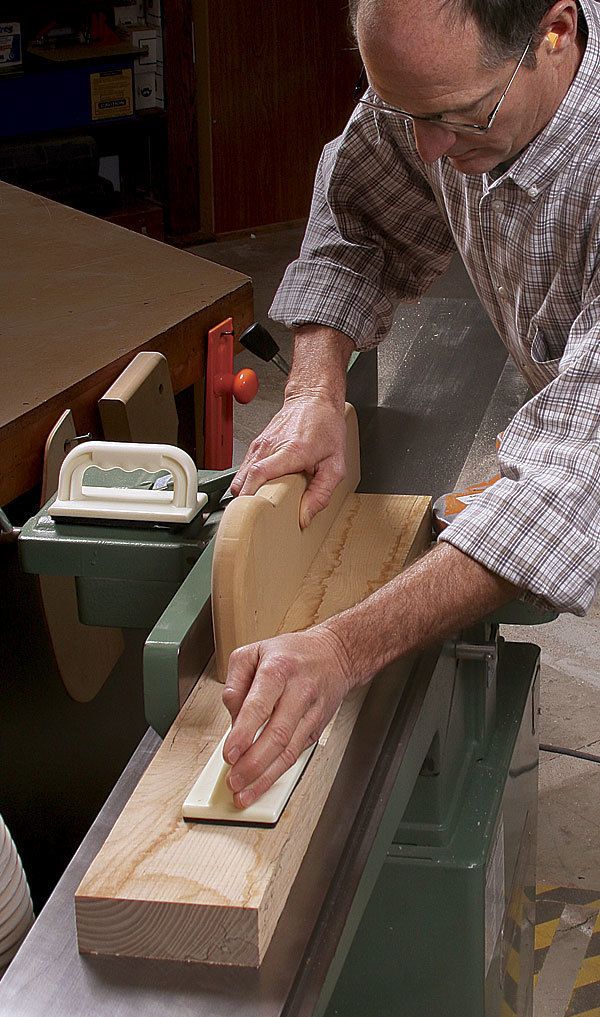
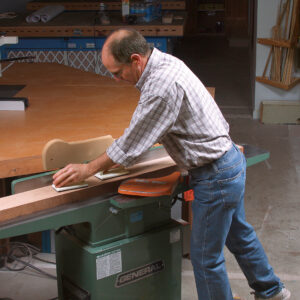
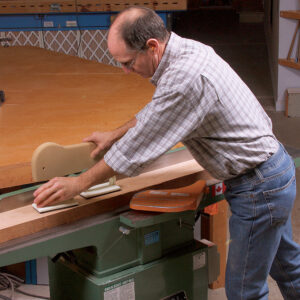
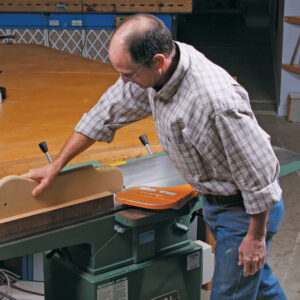
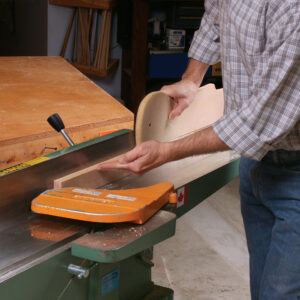
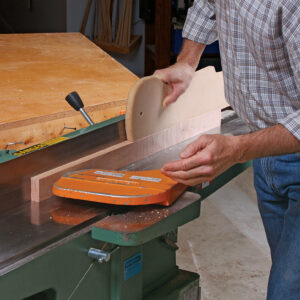
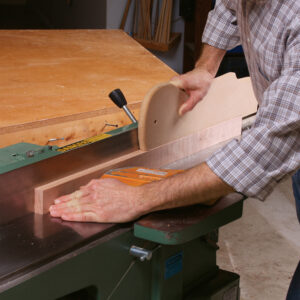
Push and walk. Adams generally starts with a push stick in his back hand for a good grip on the end of the board, and a push pad in the other for good downward pressure (1). On most boards you can keep your hands as they are, and just walk forward (2), finishing with the push stick alone (3).
Shuffle hands on long boards
The zen of push and pull
I define jointing technique using the motions “push” and “pull.” Boards start on the infeed or “push” side of the jointer. This is the most dangerous part of the process, as your hands are pushing toward the cutterhead. If they slip, you could be in serious trouble. That is just one reason I teach students to get their hands to the outfeed side of the machine as soon as possible, and learn how to “pull” the board through.
The outfeed side of a jointer is not only the safer side but is by far the most critical to the accuracy of the cut. As soon as part of the board passes onto the outfeed table, focusing your pressure there will ensure that the rest of the cut is perfectly smooth and straight. I think of that as a pulling action, though your hand and body angles don’t really change.
A safety checklist
When used improperly, the jointer can be one of the most dangerous machines in the shop. Accidents occur for a few primary reasons. The first is jointing wood that is simply too thin or short for the machine to cut safely. This can cause the workpiece to dive into the cutterhead, pulling your hands with it. My rule is nothing smaller than 1⁄2 in. thick or 8 in. long, and no cuts deeper than 1⁄8 in. at a time. Also, while it is possible to joint end-grain surfaces, it is tricky and I don’t recommend it.
Another cause of catastrophe is loose clothing getting caught in the jointer, so always make sure your shirt is tucked in or tight to your body, your sleeves are rolled up, and no apron straps or strings are dangling. Of course, protect your eyes and ears, too.
Always have the guard adjusted so that it swings fully against the fence. If it is a stationary European-style guard, keep it as close to the board and fence as possible.
I enforce a 3-in. rule on every machine in the shop. In this case, I use two safety devices to keep my hands safely clear of the cutterhead at all times: push pads and a long push stick. I use the garden-variety push pads with foam on the bottom, but I stick self-adhesive sandpaper onto the foam, which makes them even grippier. My long push stick is the tablesaw type. It hooks securely onto the end of a board, yet gives plenty of downward pressure. Never hook a finger or thumb on the back end of a board. You’ll have no idea how close it is coming to the cutterhead.
If your stock is too long for your jointer tables to support on their own, add a support stand at both ends of the jointer. Better yet, ask an experienced friend to give you a hand. Otherwise you will have to press down too hard to control the stock, and your hands or push pads could slip dangerously.
Better face-jointing
Jointing one face of a board is the first step in the milling process. When done properly, it will remove cup, warp, and twist, leaving a smooth, straight, tearout-free surface. Magic.
But before you joint any board, there are a couple of critical decisions: Which side goes down, and which end goes first? When choosing sides, the goal is control. There are always exceptions, but in general put the cupped or bowed side down. You’ll get less rocking that way. A twisted board is a little more complicated. You’ll have to make a judgment call about which side will give you less rocking and better yield.
Be careful you are not flexing a curved board downward as you press on it. It will only spring back afterward. Vary your initial depth of cut according to the amount of warp. It helps to remove as much of the problem as possible in the first pass, but I typically don’t go deeper than 1⁄8 in. to start. Once the high points are mostly removed, I reduce the cut to 1⁄16 in. or less. By the way, you do not have to joint every inch of a face to get a good reference surface for edge-jointing and planing.
As for direction, the edges of the board usually tell me which way the grain is running (see drawing, p. 44). You can also run your hand along the surface to see which way feels the smoothest and easiest, like petting a cat. If you still get a lot of tearout, just run the board the other way the next time. Move slower on your last pass; you’ll get more cuts per inch, and a smoother surface.
One push pad and one push stick—To keep your hands out of the 3-in. zone, all face-jointing must be done with push pads and/or a push stick. I generally use a push pad in my front (left) hand and a long push stick in my right hand, hooked onto the end of the board so I get the best grip possible. Face-jointing uses a lot of the cutterhead, so there is a fair amount
of resistance.
For the best possible surface, you want to keep the motion as continuous as possible. Too fast, and the cut will be bumpy. Pause and you’ll get burn marks. Turn your feet forward, parallel to the jointer, so you are ready to walk forward as needed. If you must reposition your hands, or trade a push pad for a stick, keep the board moving with the other hand.
Edge-jointing is different
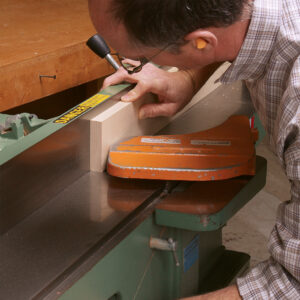
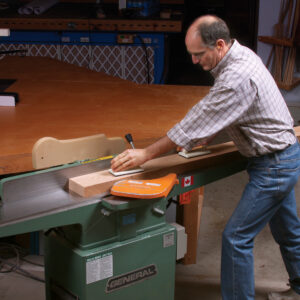
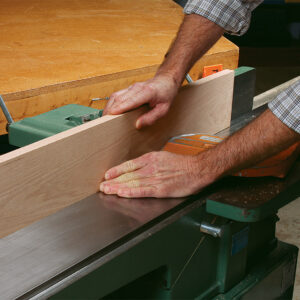
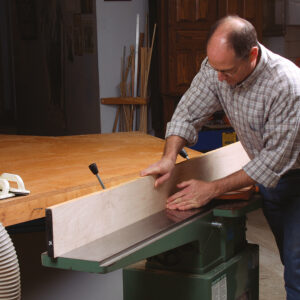
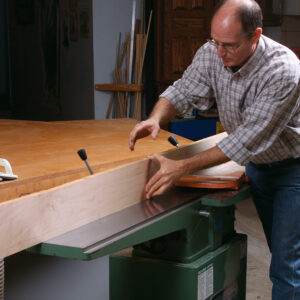
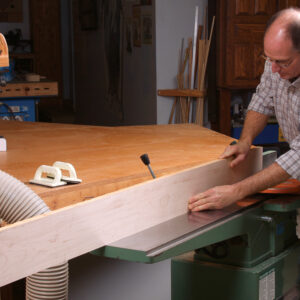
You have to combine three different actions to edge-joint a board successfully. Like face-jointing, edge-jointing requires that the board be held down on the table and pushed forward with that steady, continuous motion. At the same time, however, it must be held tight against the fence.
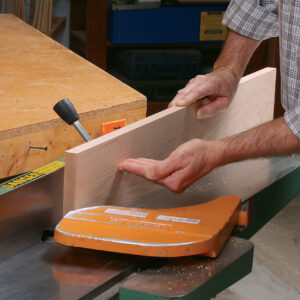
Three actions, two hands—the math doesn’t work. The way to solve that problem is to dedicate hands. The right hand does the holding down and pushing forward, while the left hand pushes against the fence. Check the photos for how to do this safely on all types of boards. Again, for the steadiest feed rate, get your feet ready to walk forward and start with your hands in the best position. If the board is tall enough to clear the fence, try placing your right (push) hand farther forward. The goal is to avoid repositioning it.
I believe that you have more control using your hands to support the board. But if the board is under 3 in. wide (tall), I use a push stick with my right hand, on top of the board. To keep my left hand safe, I proceed as usual but pull my left hand away briefly when it nears the cutterhead, raising it up and over to reposition it as a featherboard on the far side. I keep pushing with the stick the whole time to maintain that continuous motion.
The jointer is one of the best time-savers ever invented, replacing the long session of handplaning it used to take to level and square each piece of lumber. Now you know how to use it safely.
Edge jointing is next
After jointing one face of a board, that surface goes against the fence as you straighten and square one edge. The trick here is to maintain pressure on both the fence and table while keeping the motion steady and your fingers safe.
Keeping hands out of harm’s way
Tricks for long boards
Tips for narrow boards
On boards that aren’t as tall, use a long push stick and change your technique to keep your fingers at least 3 in. away from the cutterhead.
Marc Adams runs Marc Adams School of Woodworking in Franklin, Ind. For a course list and more information, go to MarcAdams.com.
For the full article, download the PDF below.



Log in or create an account to post a comment.
Sign up Log in