Making models makes sense
Furniture maker Sarah Watlington shares insights into the value of scale models as well as a few simple tricks for their construction.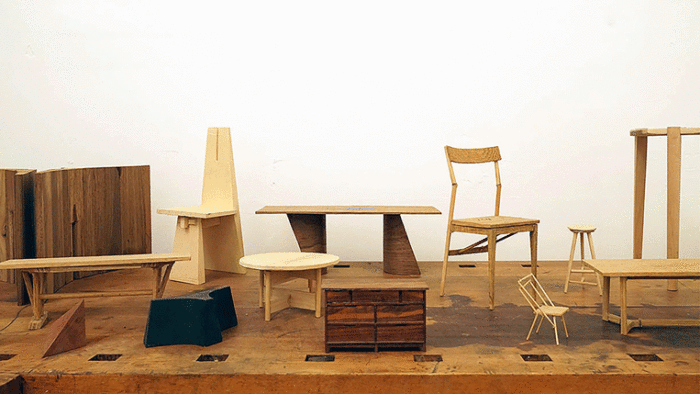
Scale models are the best! I’m such a fan that for a few years now I have taught classes on the practice. Nestled in the design development phase between rough sketches and full scale mock-ups, models generate a wealth of information, illuminate design and construction pitfalls, and bolster confidence to attempt new and challenging forms. It can take months to make a full-scale piece of furniture but only hours to construct a model. This allows one to explore more ideas faster. And since you don’t need access to expensive shops to make them, scale models are also egalitarian.
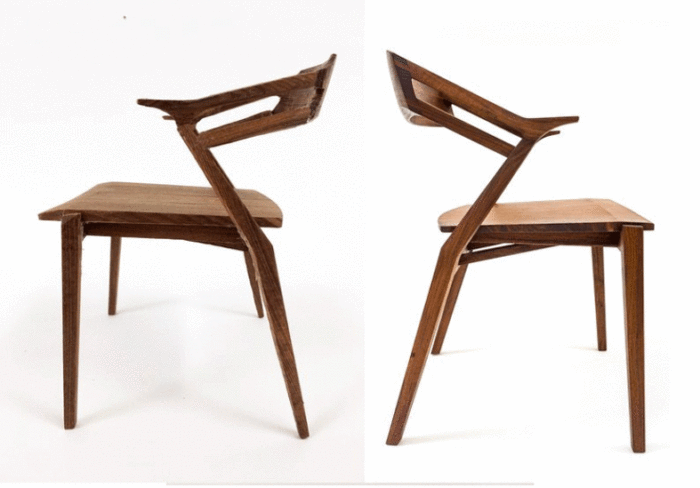
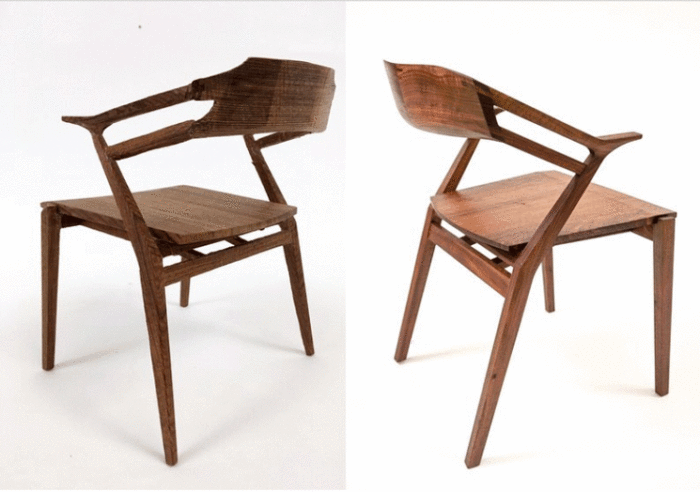
I realized the big advantage of these little tools when designing and building my Heron Chair. One day when frustrated with a design dead-end, I snapped off a piece of the model and rotated it 90° to a horizontal position. From this aha! came the double member detail on the arms. Angles and splay of the legs were pulled directly from the model with a small bevel gauge. No trig, no problem! The photos of the model (left) and final chair (right) side by side highlight how strongly the model can inform the outcome.
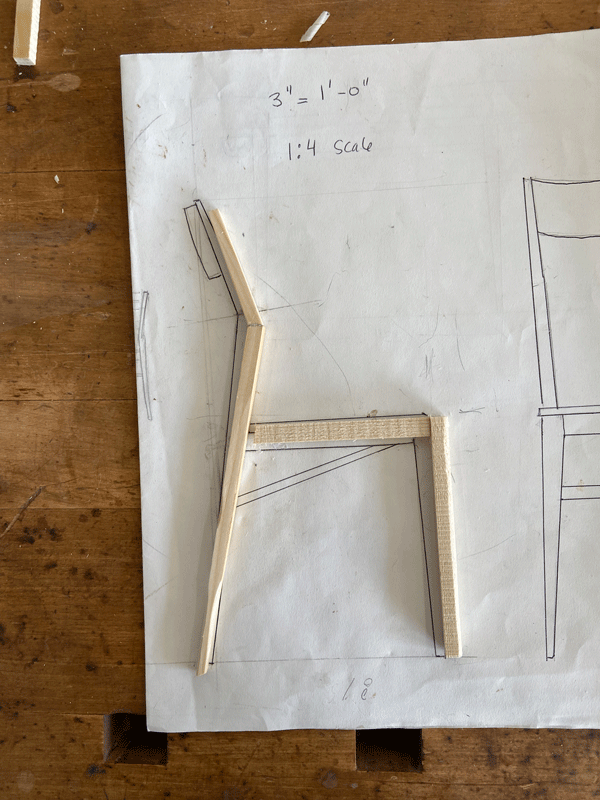
Understanding what the scale in scale models means is the first step (duh). Chair models are typically built at a quarter scale or 1:4 when working with imperial measurements. This is also represented as 3”=1’-0” because 12 inches divided by 4 equals 3”. Tables and case goods are 1:8, 1 ½”= 1’-0”, or 1:12, 1”=1’-0”. The scale you choose depends on the size of your final piece and how much detail you need from the model.
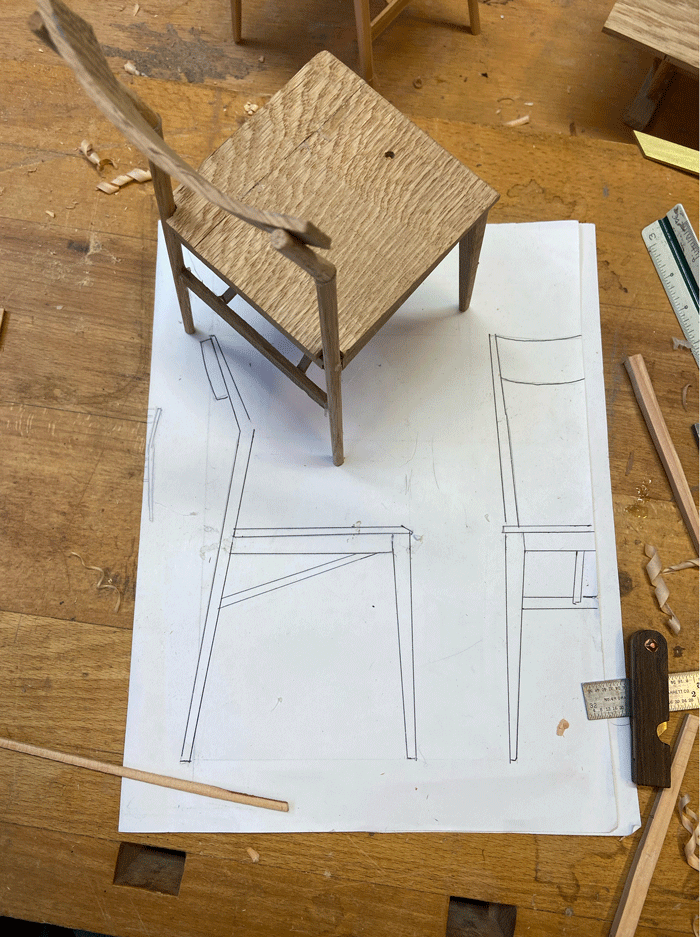
Orthographic, or 2D drawings, are the foundation to build your models. Usually a front and side view will suffice. These can be drafted on the computer or by hand. Learning how to read an architectural ruler unlocks this skill to draw by hand and printable rulers are easily found online.
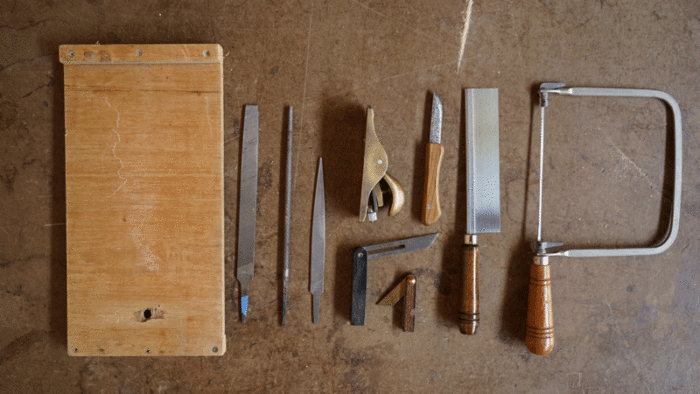
 The great thing is models can be made completely with hand tools. Bench hook, hand saw, coping saw, file, block plane, chisel, and double stick tape are all you need. Don’t sweat it if you’re missing some of those; just improvise.
The materials aren’t machine prohibitive either. You can purchase balsa wood, dowels, and cardboard at any craft store. If you work in a wood shop you will soon gain an eye (and maybe hoarding tendencies) for offcuts that are model-ready dimensions. Cutting small stock on a bandsaw is a safe and effective method as well. I tend to build my models in their final wood species to get the best idea of what they will look like. Or, like the Heron chair model, at least in the general tone.
One simple trick to working with tiny pieces is to (carefully) clamp your block plane upside down in your vise and run the stock (carefully) over the blade. If you don’t have a vise you can double stick your workpieces to the bench and plane dimensions and tapers with ease.
Once you have all of your pieces cut and shaped, glue your model together right over your drawings. I prefer hot glue for the malleability while others like the precision of super glue.
Is that all? No, but it’s a start. Try it out. Take risks and push new ideas. Throw it away if you don’t like it! You’ll have only lost an hour.
See more of Sarah’s designs at https://www.sarahwatlington.com






Comments
I love your attention to the details in your furniture.
Log in or create an account to post a comment.
Sign up Log in