Develop Your Own Designs
A step-by-step process unlocks your creativity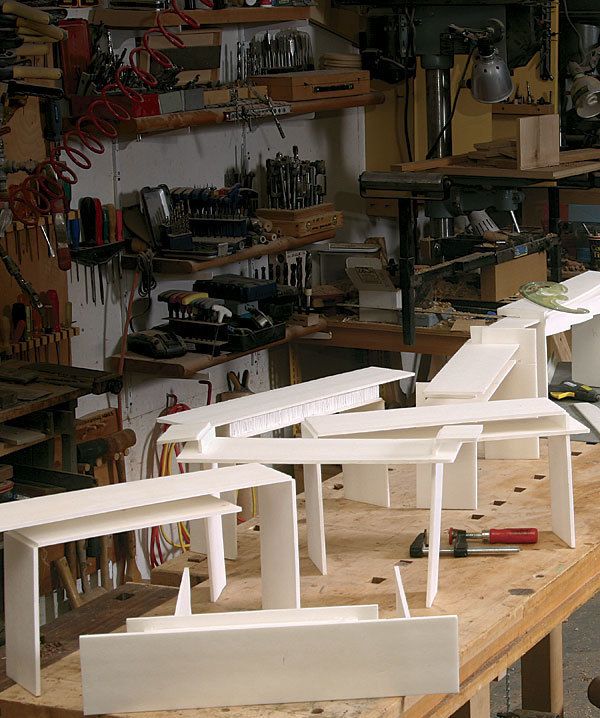
Synopsis: Learning to design furniture can seem intimidating, but Michael Fortune has boiled down his technique into seven basic steps that any woodworker can follow. His process begins on paper, works its way up to models, and requires la sense of adventure and a commitment to keeping all your notebooks and never throwing away an idea. So don’t get bogged down worrying about whether you can design the perfect piece. Take some tips from Fortune, let your ideas flow, and start building.
For many furniture makers—even those with advanced technical skills—design is the most daunting aspect of the craft. Learning to design can seem intimidating, even mysterious. But there’s no magic involved. Anyone with the desire and a little perseverance can be creative. In fact, the overall concept for a piece of furniture can be discovered and its details beautifully resolved by walking through a series of simple steps. When strung together, these steps form a dependable design process. The more you use it, the more intuitive it becomes.
Whether I’m designing a chest, a chair, a bed, or a bench, I follow the same steps. I always generate multiple options to choose from—the more the better. To keep the ideas flowing fast, I focus only on the visual aspect of the pieces at this point and figure out how to build them later. This approach has the great benefit of forcing me to explore new woodworking techniques, which makes the work more fun and adds arrows to my quiver for future designs. Along the way, I discard nothing, so with each project I add to my idea bank, building up a repository of sketches, models, photos, and techniques that I’ll draw from for the rest of my life.
Here are the seven basic steps:
1. Identify and analyze—I start my design process by identifying what I want to make—a chair, a cabinet, a built-in bench—and analyzing the hard constraints on the piece: what functions it will serve, what space is available, and the requirements of weight, stability, and traffic around it.
2. Set the goal—I clarify what I want from the piece aesthetically and technically. Do I want a completely new design, or something to match an existing style? Do I want to learn new techniques? Work with specific materials? Is the priority function or appearance? Or are the two equal?
3. Generate ideas—This is the fun part—and it’s the heart of the matter. The key is to generate as many ideas as possible, either on paper or in model form. The tools can include transparent paper and a soft pencil for doodling and drawing, and whatever else works for making quick models: wire, foam, MDF, softwood, Popsicle sticks, and straws.
For the full article, download the PDF below.







Comments
As someone new to woodworking I find just getting an idea from my head to paper to be the biggest hurdle (after that being getting rough cut lumber in a jeep). I'm a horrible artist and have had trouble picking up SketchUp or like software. It gets me down because I know if I start sawing wood without a plan I'm just going to generate waste and not something nice and usable. I like the flow that Michael Fortune suggests and will try to employ it myself.
I think whatever tool you use to do your design work, you need to practice using it. Whether you are drawing on paper or on the computer, start by drawing existing things like your desk or dinning room table or a bookcase. That way you can get used to using the tools without also having to worry about the design.
It's like cooking. When you start out, it's best to follow existing recipes. Once you have the methods down and figure out the flavors, then you can branch out into developing your own dishes.
I agree with the three steps Michael, but I find working to make the best use of the available timber is crucial to my design journey. I only work with pre-loved timber so my resource is quite limited and my designs must find a way to best exhibit the timber's beauty.
Log in or create an account to post a comment.
Sign up Log in