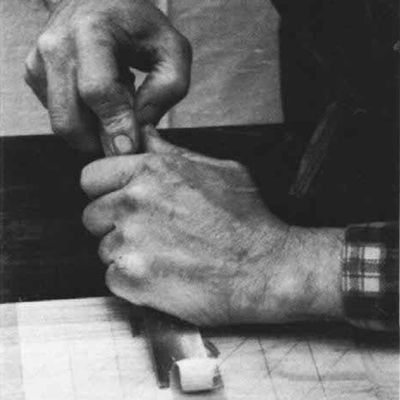
Synopsis: Robert L. Buyer shares some simple exercises in basic tool handling to enable beginner carvers to save time fumbling around in how-to classes. These exercises concentrate on the gouge, parting tool, and veiner and how the various cuts are affected by the grain of the wood. He lists the equipment and wood needed to get started and advises against splurging on a kit of tools. The concise article then spells out step by step the methods that will get you started.
Woodcarving classes are usually unstructured meetings where a teacher advises and helps a student with a carving project. This method has the advantage of enabling a student to produce a finished carving immediately. The disadvantages are needless time spent fumbling around, often discouraging results, and at times the creation of poor work habits. This is how I learned to carve. I’ve often thought that some simple exercises in basic tool handling would have helped me tremendously, and would have reduced the time it took to learn.
Therefore, in preparing to teach woodcarving last year, I developed a tool lab to introduce the basic techniques. It went rather well, and I hope it will help both novice carvers and other teachers. I am not advocating hours of tedious exercises, one after another, which must be mastered and yet produce only chips. These exercises concentrate on the gouge, parting tool and veiner, and how the various cuts are affected by the grain of the wood. Just experiment with it and observe carefully at each step.
You’ll need a piece of soft wood (pine or bass) at least 6 in. wide, 10 in. long and 1/2 in. thick; two clamps for holding the wood to the bench; one or more carver’s mallets, preferably of different weights and styles; a carpenter’s square, soft pencil and a broad felt-tip marker; and three straight (not bent) carving tools—one gouge (such as a 5-sweep, 20 mm), one veiner (about 12 mm) and one parting tool (about 6 mm).
Please don’t rush out and buy a kit of tools just for this exercise. If you have access to professional tools through a school or a friend, by all means use them. If you don’t have access to tools and are sure you want to take up carving, then the three tools needed for this exercise constitute a beginning set and should be bought individually. You will be ahead of the game, both artistically and financially, if you buy full-size, professional-quality tools one at a time. As you gain skill, you will learn exactly which ones to buy next. A few fine tools are much better than a roll of small, clumsy ones. Swiss tools (my favorites because of their iron, shape and octagonal handles) currently cost between $5 and $10 each, and the three specified here can be purchased for about $20 total.
1. Draw a series of parallel lines on the wood, about an inch apart. Draw some lines parallel to an edge, some perpendicular to this edge and some at a 45° angle.
More on FineWoodworking.com:
- Axes and Adzes for Bowl Carving – Dave Fisher shows you exactly what he looks for in his go to tools for making chips fly.
- Carving Leaves on a Turned Post – Master Class
- Three Simple Moldings – You can learn to carve without spending a fortune on tools
From Fine Woodworking #9
For the full article, download the PDF below:






Log in or create an account to post a comment.
Sign up Log in