Add a height dial to your table saw
Eliminate the need for numerous test cuts with a simple wooden pointer and a masonite ring.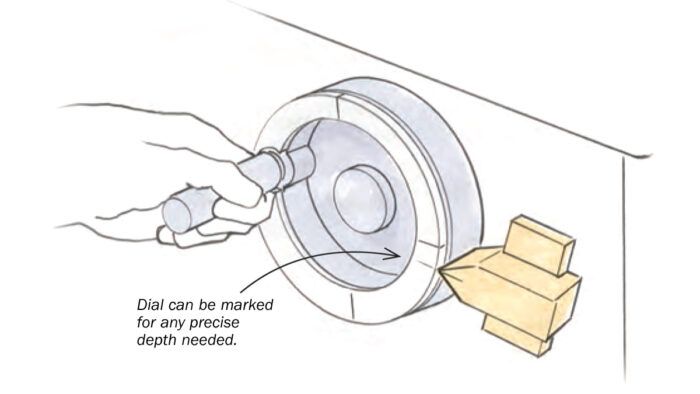
Blade height is critical for a variety of joinery cuts on the table saw. In the past I would set the height as accurately as possible and sneak up on the precise depth with a series of test cuts. When I realized that one revolution of the handwheel moved the blade up 1/4 in. on my saw, I decided to create a pointer system to make it faster and easier to set the height accurately, as well as to return to an earlier setting.
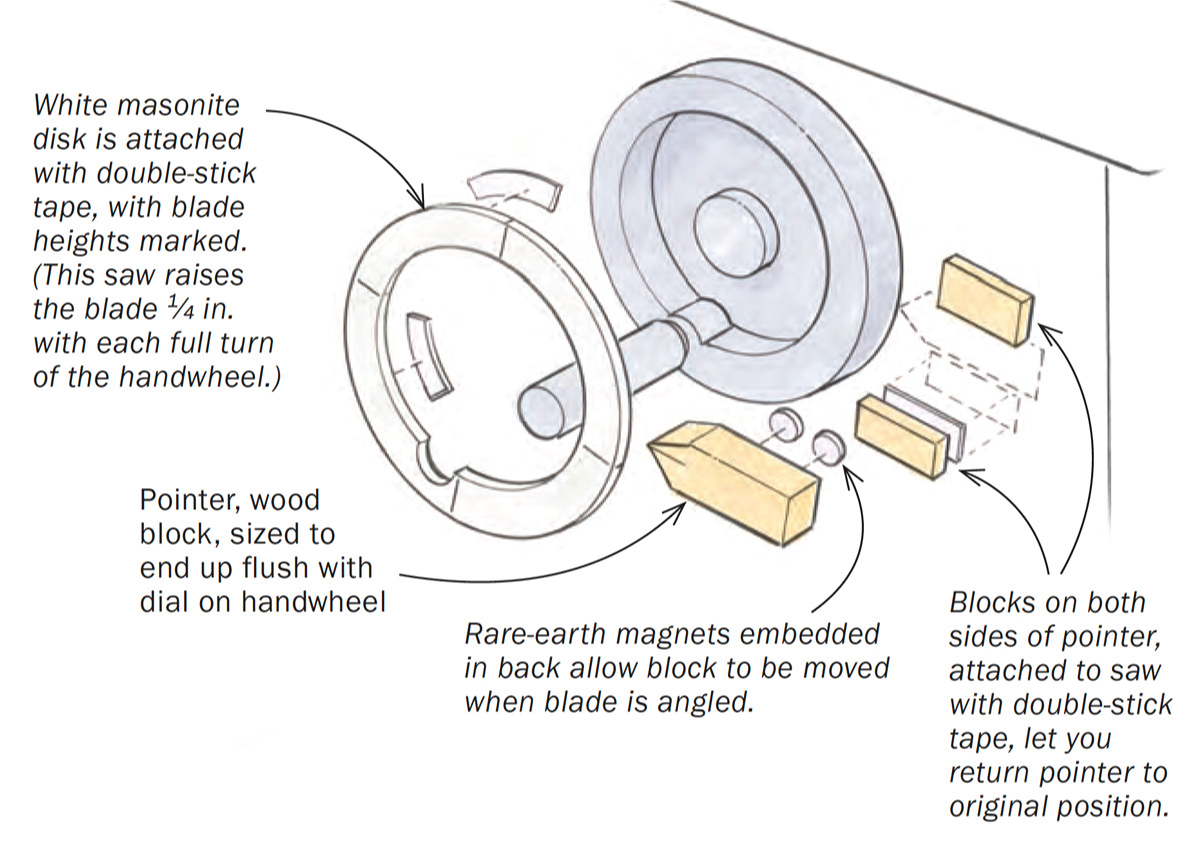
First, I made a wooden pointer that attaches to the saw cabinet with magnets. Using magnets lets me reposition the pointer when I make a bevel cut. That’s necessary, since tilting the blade repositions the entire handwheel. I also attached small blocks to the cabinet, one on each side of the pointer, with double-stick tape; they let me return the pointer to its original location.
While you could mark the handwheel directly for various heights, I attached a ring made from thin white masonite to make the marks more visible. I divided the ring into quadrants to mark 1/16-in. height intervals.
I also make a mark on it whenever I need to return the blade to a specific setting. I use a grease pencil for all of these marks, so they’re easy to redo if I change the blade to one with a slightly different diameter.
—JIM COX, East Aurora, N.Y.
Illustrations by Dan Thornton
From Fine Woodworking issue #302






Log in or create an account to post a comment.
Sign up Log in